")
Either you love it, you hate it, you don’t “get” it, or you’ve never done it.
Downward Facing Dog (Adho Mukha Svanasana) is a major staple in hatha (physical) yoga, yet many people struggle to understand the purpose of the pose and end up misaligned and stressed out. And for good reason! There is a lot going on in Down Dog, and I’ll be the first to say that it is not an easy pose. Should my weight be mostly in my arms or my legs? Should my knees be bent or straight? Is my back rounded or arched? Should I suck in my stomach? What if my heels don’t touch the ground? And so on.
Down Dog is an asana (pose) that demands a considerable amount of action all over the body. This full-body action is particularly difficult if we have tight hamstrings, calves, shoulders, and/or lats. It is also a mild inversion (head is below the heart), which can make things even stranger for beginners.
As someone who despised Downward Facing Dog so much that it almost prevented me from ever doing yoga again, it is very important to me that people who come to Stone Turtle Yoga understand this pose and learn how to make it work for their bodies. A proper understanding, combined with right practice, just might transform this challenging asana into something that feels really quite good, and even restful after more intense poses.
Here are the main focus points of Downward Facing Dog. Keep in mind that there are many variations of this pose, many of which are beneficial for people with less flexibility, but here is the “final version” of the pose along with what the body parts are supposed to be doing (click image to view larger).
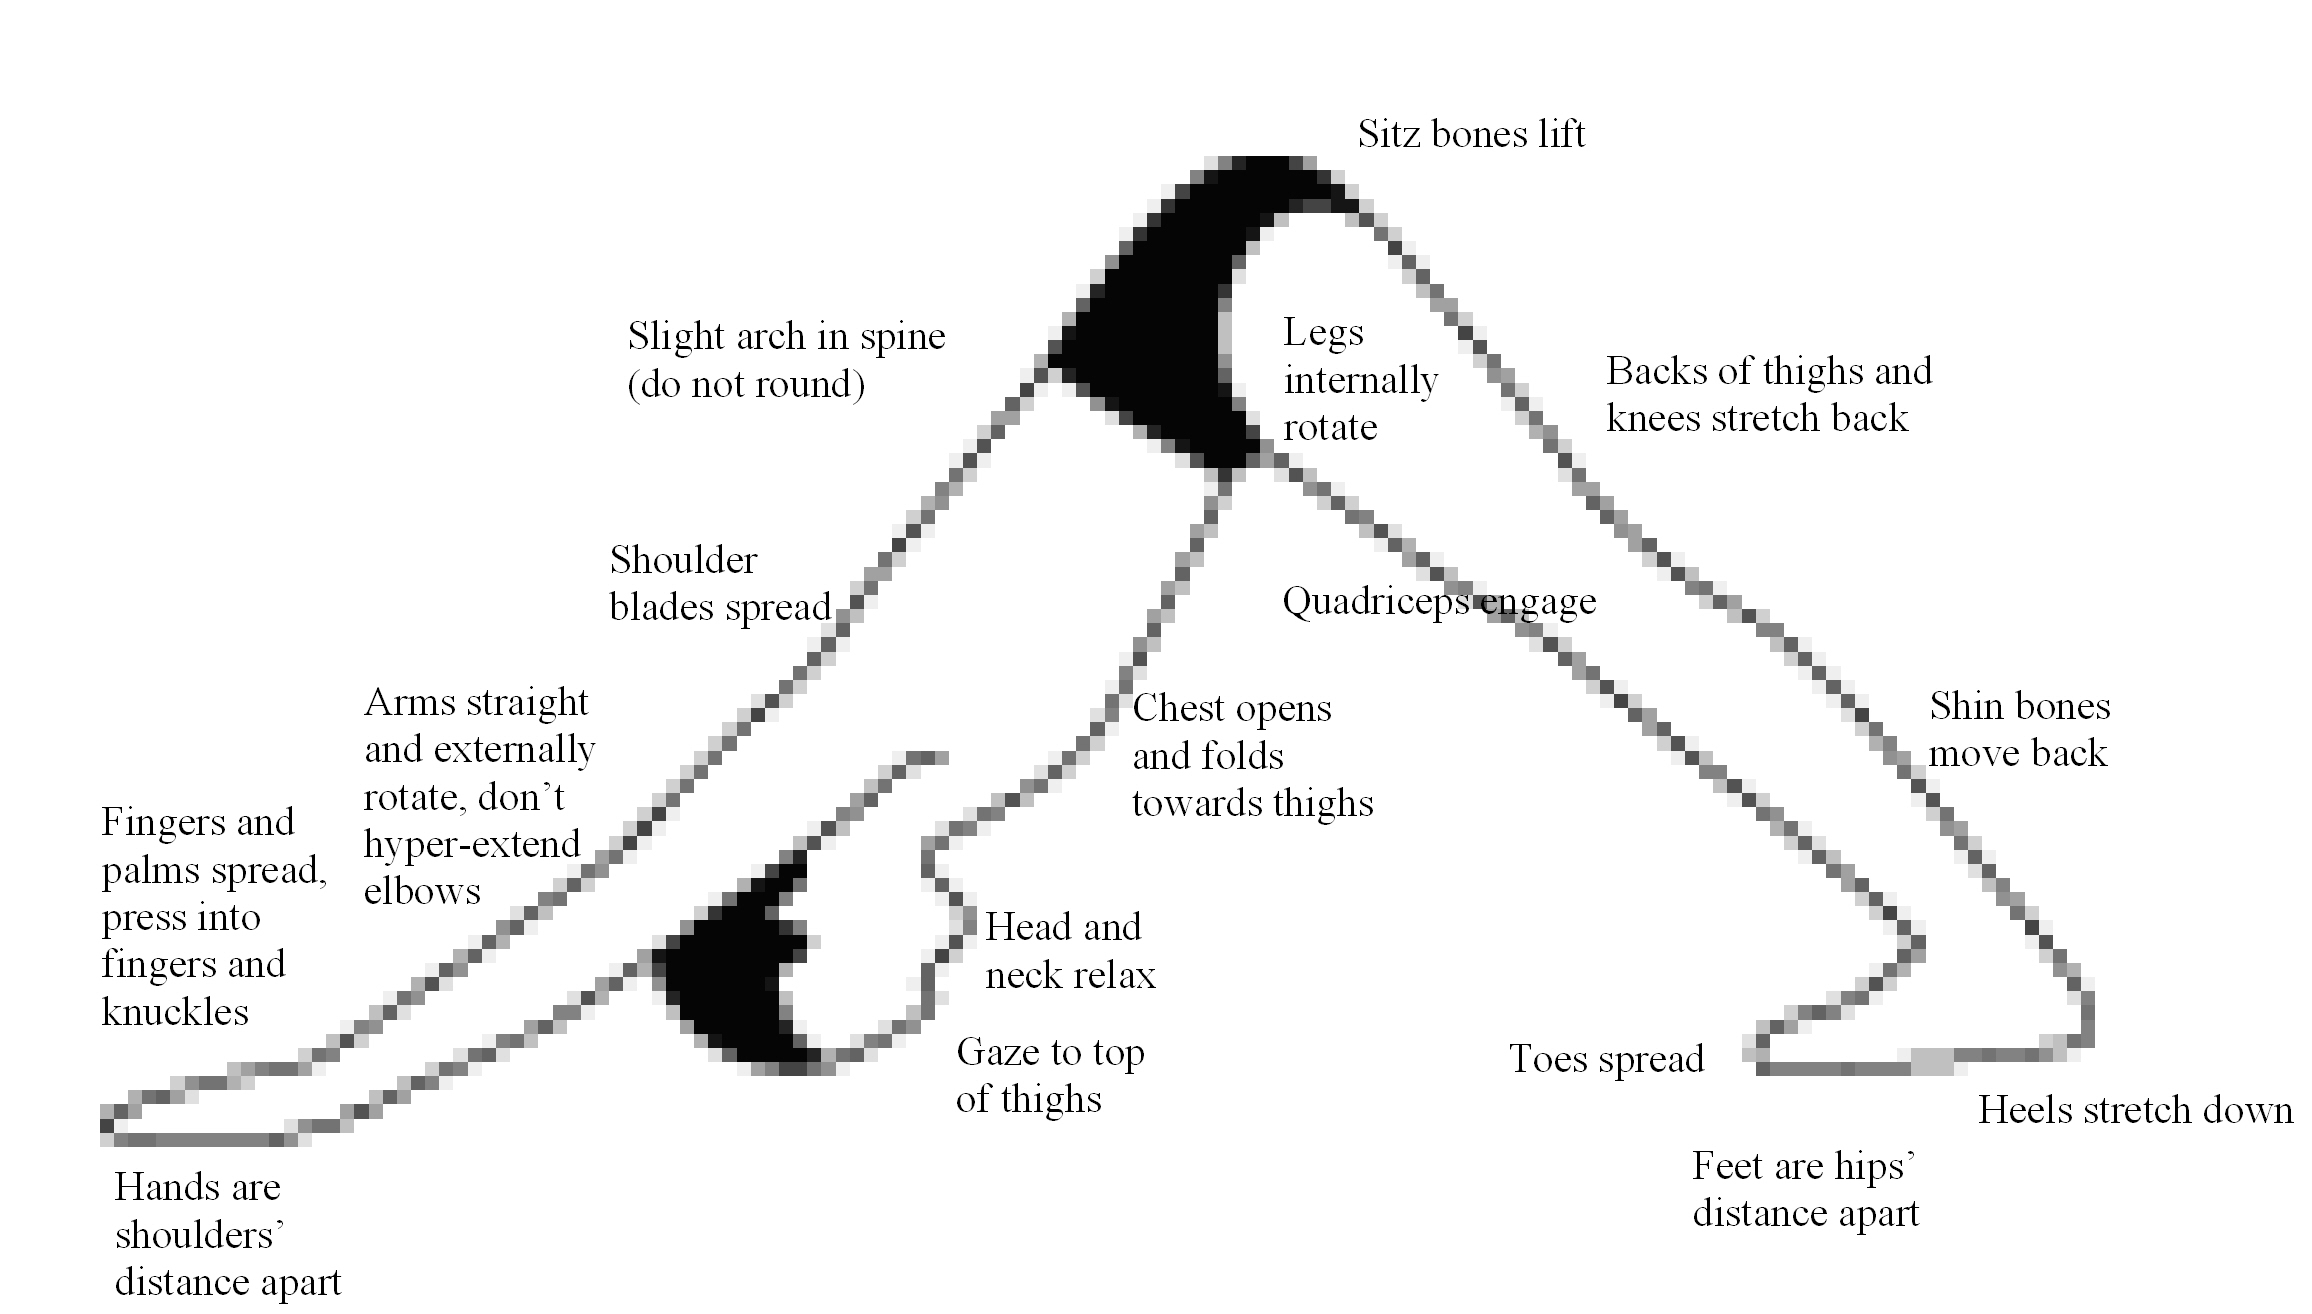
Downward Facing Dog (Adho Mukha Svanasana)
The emphasis in this pose is on the hamstrings, which attach to the Sitz bones and the backs of the knees. It is also on the shoulders, parts of which are engaged and parts of which are stretched. To get the action of the shoulders, try to press the mat/floor forward with your hands (it won’t go anywhere, but this is the action). Hinge at your waist and try to fold your chest towards your thighs. Imagine you’re going to lower your forehead all the way to the floor.
If hamstrings are very tight, the back will tend to round and the heels lift up. A nice modification here is to bend the knees enough so that a neutral or slightly arched (opposite of rounded) spine is maintained. Again, if hamstrings are tight, more weight will naturally fall into the shoulders, making this pose highly uncomfortable. Focus on reaching the hips up and pressing the backs of the legs back. Go for equal weight between the hands and feet.
Keep head, neck, and face muscles completely relaxed. Breathe into the belly and practice often! As always, if you have questions or concerns, don’t hesitate to ask.
See you in class!
Mariah
1 comment
I am glad you posted this! I will practice … Didn’t know about rotating the arms… Good information, I hope you post more of these.
Thank you! You guys are awesome!